Wedding Album Maker Gold
Use your CD or DVD burner to create Wedding photo album for playback on TV with DVD player!
"Amazing output effects, i love it! " --- Mike
"I am very happy with this program. It’s so easy to use." --- Jenny
How to Use Wedding Album Maker Gold
You have thousands of your wedding photos and don’t know how to do with them? You worry about the thank-you-gift for your families and friends? You want to save the large sum of money spent on the payment for professional wedding photographer? If the answer to all the questions is “yes”, and then the Wedding Album Maker Gold is the very helper you need. With Wedding Album Maker Gold, you can use your CD or DVD burner to make high quality photo slide show DVD disc in less than half an hour by yourself.
![]()
![]()
This wedding software makes it possible to produce professional wedding album slideshow with several clicks. No experience is needed and you can create your unique album with the navigation of the software. Three easy steps are enough to make wedding slideshow. The following parts will explain how to use Wedding Album Maker Gold in a very detailed way.
The main window of Wedding Album Maker Gold is as follows:
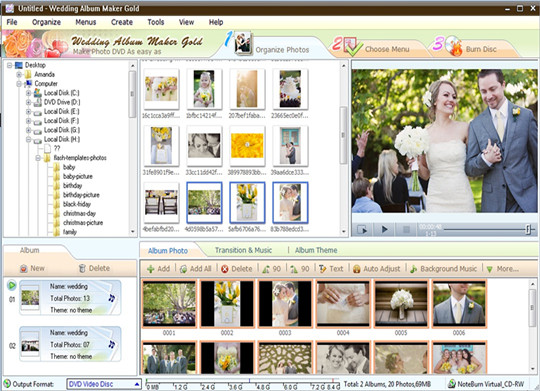
Figure 1 the Main Window of the Wedding Album Maker Gold
Then you come to the first step: add and organize your photos. After clicking the “Create New Project” button or “Photos” button, you can see a widow as the following:
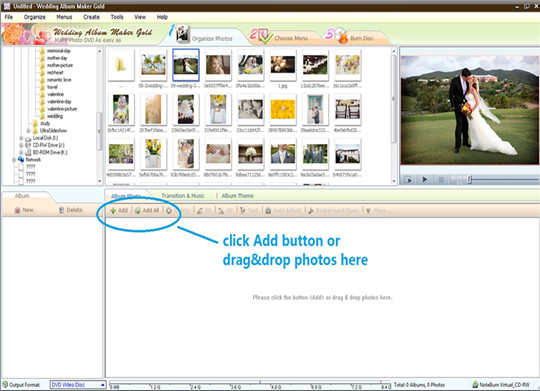
Figure 2 the Window of Organizing Photos
Now click the “Add Photos” button and add your favorite wedding photos to your album. You can delete and rotate the photos according to your demand by selecting them. Click “More” and you can customize your album with more choices.
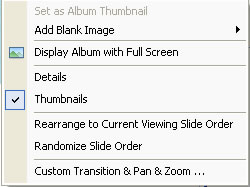
By double-clicking or “View Photos” button, the selected photo can be enlarged and you can customize the transition effects, Pan&Zoom effect, text, art clips and subtitle appeared in the slideshow, moreover, the brightness, contrast, gamma and the color of the photo can also be processed by yourselves.
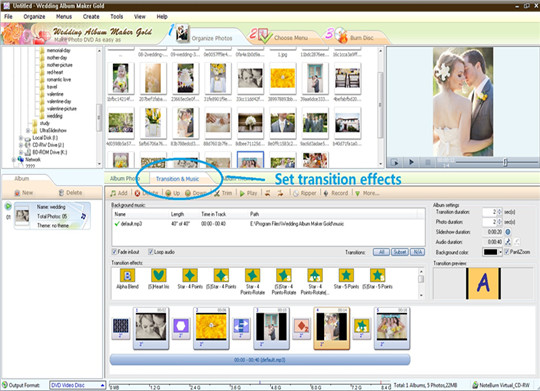
Figure 3 the Window of Customizing Photos
After you finish the customization of your wedding photos, you can have a preview of your creative album slideshow by clicking the “Preview” button on the left side of the window.

Figure 4 Preview the Album Slideshow
Then let’s come to step 2: retouch your album by adding your favorite photos. Click the “Music” button to add the music which may be quite meaningful for both you and your partner.
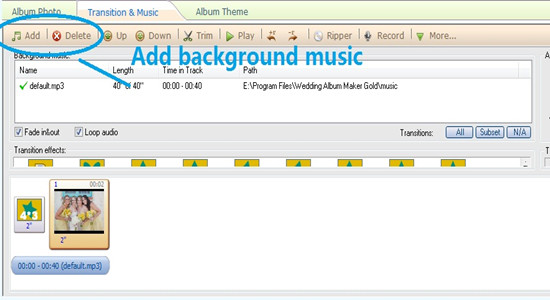
Figure 5 Add Music and Theme to Your Album
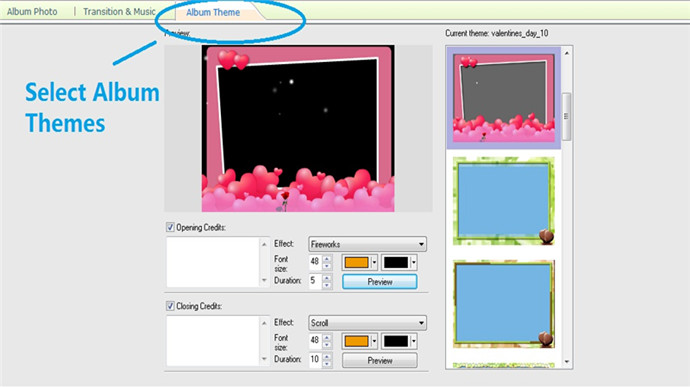
Figure 6 Add Music and Album Theme to the Slideshow
After you finish all these organization and customization, you can preview your album again and make any modification as you like.
Now, it’s time for step 3: burn your album on a DVD/ CD disc. Click the “Burn” button and begin to burn your album slideshow at once.
But first of all, you need to set several parameters, including output format, type of recorder, the number of copies, etc. Generally speaking, if you want to save the transition effects and the background music, you’d better choose DVD or SVCD format to burn your album, since transition effects and background music are not available to VCD 2.0 still image. Besides, the TV system needs to be set (NTSC or PAL). It is also allowable to save other additional files on the disc, so it would be quite convenient to save any other files relating to your wedding on the same disc.
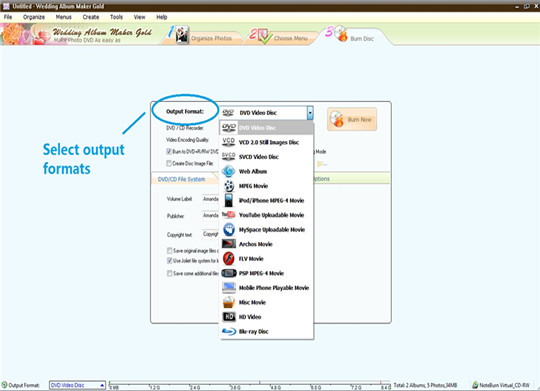
Figure 7 Burn the Album
After these three easy steps, your amazing and unique wedding album is finished. You can enjoy it on your TV and share it with more families and friends.